

Hello to my bee-mates and anyone else reading along. It's "my month" for the block of the month in my sewing bee, Stitch that Stash. I'd love for you all to use my skateboard block pattern. I recently used it for a quilt for Jack, found here. The pieces are cut out and then appliqued to the background fabric. I then added a log cabin border, going twice around the main block. I'll spell it out for you below but I'll bet you with the measurements you'll be off and running on your own.
Let's get to it.

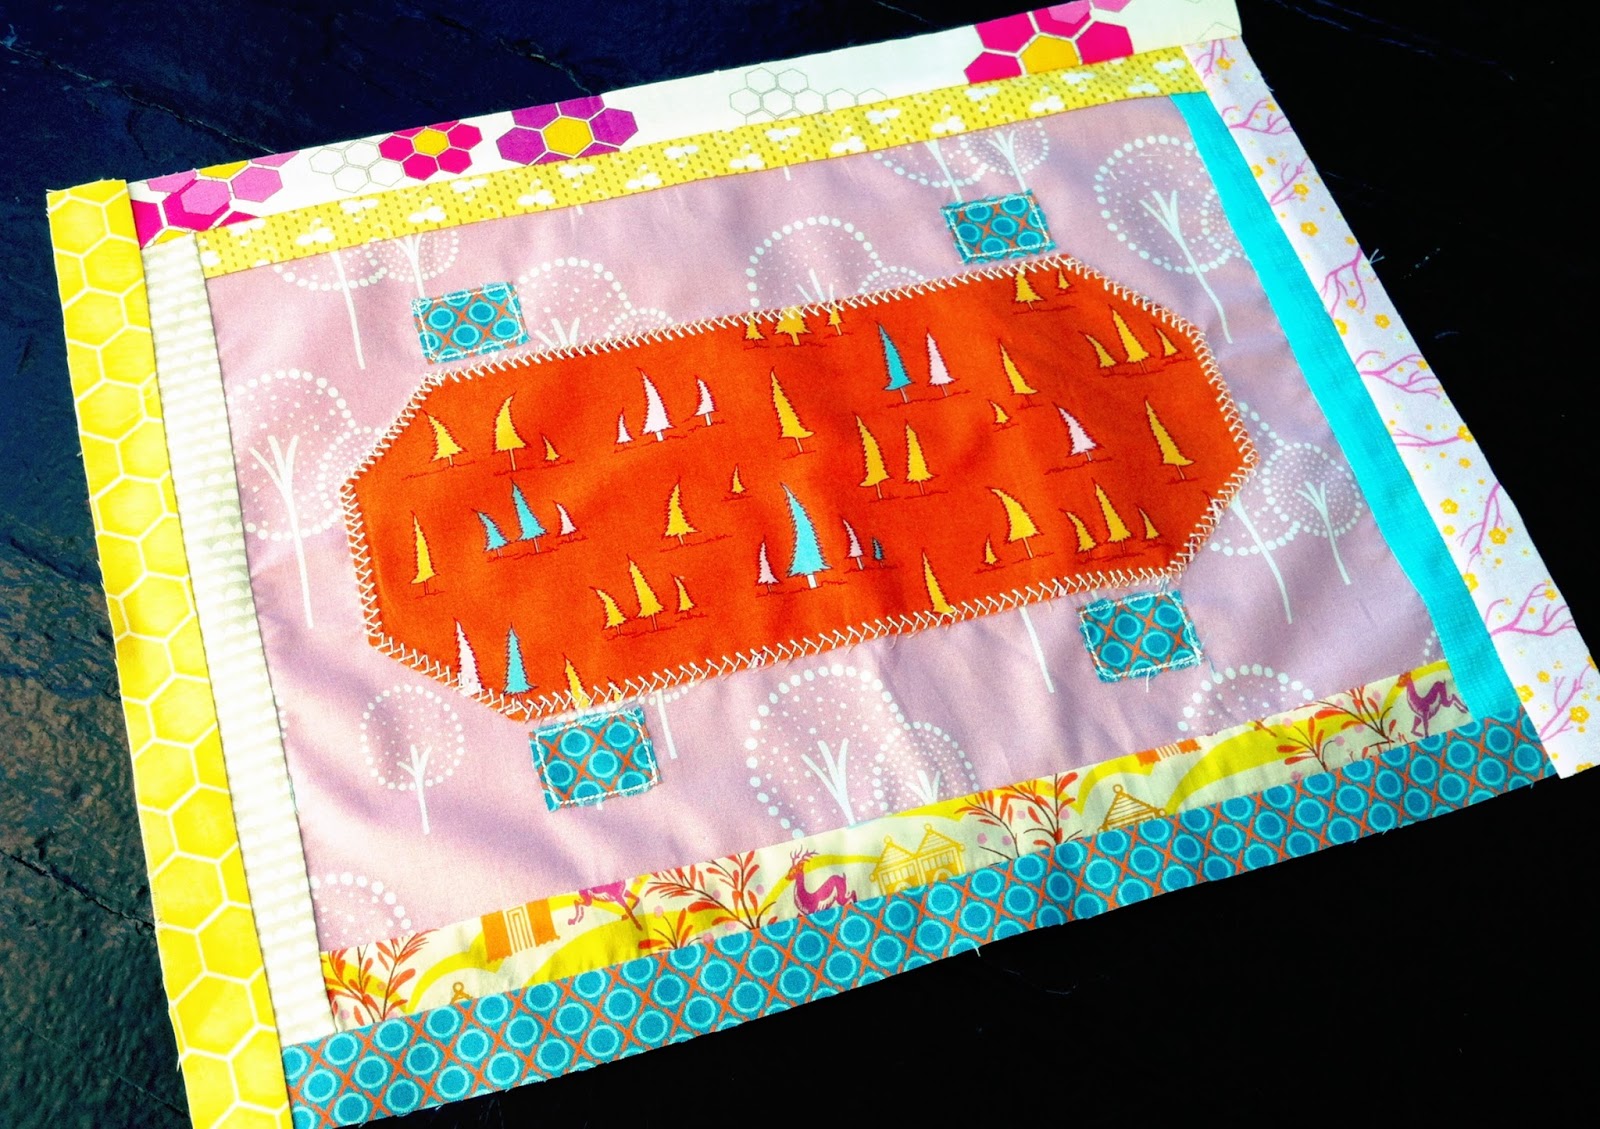
Colors: I've chosen "girl" colors for this sewing bee skateboard quilt. The center fabric is the color inspiration. It is Forest Hills, in Sweet, by Anna Maria Horner. The colors in this fabric are yellow, purple, orange - (called toast cause it's not a bright orange), turquoise, light pink and white.
Fabrics: I like to combine textures so along with quilting cottons feel free to use flannels and voiles.
Block size:
The background fabric is 10"x 15"
The rectangle for the skateboard (before trimming corners) is 5"x 12"
The wheels are 1.5" x 1"
The fabric strips for the log cabin border are cut at 1.5" wide and trimmed to length of edge
Examples of ways to decorate/create the skateboard:
Here are some blocks from Jack's quilt to show different ways to combine fabrics for the skateboard. If you chose to combine fabrics just trim the rectangle back to 5x12 after you sew and press the seams in your skateboard. You can also go with just one fabric.

Color Values: Use a light background and a dark or medium skateboard/wheel fabric OR use a dark background and a light or medium skateboard fabric/wheel fabric. This way the contrast in the values will make the skateboard show up well. My least favorite block above is 2nd row, 1st block, because the background fabric AND the skateboard fabric are both of medium values. You can use a solid background fabric or chose one that has a subtle print in it. All four wheels should be from the same fabric.
Begin cutting the skateboard:
Here are the cuts, step by step, for the skateboard with trimmed corners.

Cut your background fabric and your wheels next:
The background fabric is cut 10 inches wide and 15 inches in length.
The wheels can be cut with a long 1.5" wide and 4" long strip. Cut 1 inch at a time for each wheel.
Arrange all of the pieces:
Now place it all together with the board centered on the background. The wheels are placed at each end of the sides by the corner. Lay the longer side of the wheel next to the board. Leave a little space between the wheel and the board (I hand quilted around each board on Jack's quilt and this gave room for the stitch to show).

Log cabin border strips:
I like to lay out all of the strips next, to decide which fabrics work best with each other and in what order. At this point I still have not done any sewing. The strips are all cut at 1.5" in width. The length will vary depending on when it is added on. The first strip will be 1.5"x15" and lay along the bottom side of the block. The next strip will be slightly bigger, and so on as is the case when making a log cabin block. I cut them plenty long at this point and trim them as I sew them on. (no sewing yet)

Now that all of the fabrics are selected, applique the main skateboard to the background.
Applique:
Sewing the skateboard and wheels to the background fabric can be done with a variety of stitches. Use whichever you prefer! I've done it with a straight stitch just inside the edge of the skateboard, a zig zag stitch that catches both the skateboard and the fabric outside of it, or you can use any other fancy stitch your sewing machine may have. If the fabric you are sewing does not feel stable, you could opt to use some Pellon interfacing ironed to the back of it. I didn't do this on any of mine. I DID do this on the snowman block I made for Nicole last month because of all of the seams. I don't recommend anything too heavy though or the block will be stiff.

How about that new pin cushion?! So handy!

Wheels: I used a straight stitch and went around twice.


bottom strip, cut to the length of the block
Log Cabin Border:
It's time to put the log cabin border on. I used a 1/4" seam on my strips (cut at 1.5" wide) and went around the block twice. I started at the bottom, sewing the strip on face to face, then iron it away from the block, and go to the right side to attach the next strip and so on.

Press toward the outside of the block before adding the next strip

Right side strip, cut to the length of the right side, plus the additional strip on the bottom

Cut longer, and trim after sewing it on

Press towards the outside of the block before adding the next strip

Top strip sewn on, now trim off those overlapping ends and press the top strip away from the center. Repeat for the final side and trim and press towards the outside of the block.

Trim up the first border
The first border is now on all 4 sides. I trimmed each one to be somewhat straight - they should be roughly 1" wide now. Do the same thing again, adding a second log cabin border. Trim again so that they are also 1" wide. It doesn't have to be exactly straight or exactly 1" so just trim it and it will be fine!
This is what the back looks like with all of the pressing going away from the center block.
You are finished!
Your block will measure at approximately 14" wide by 19" long depending on how much trimming you did. When I assemble the quilt I will add extra narrow strips here and there to balance out the size difference. If your block came out a little smaller, it is fine. My block above is 13.5" by 18.5" because I tend to sew with a slightly larger than 1/4 inch seam and I trimmed a bit more in places.
If you look at Jack's quilt again, you will see that the number of log cabin borders varies throughout the quilt. In Jack's quilt, I cut some of those strips 2 inches wide and I did not trim them before adding the second log cabin border. I decided to go a bit more narrow and a little less wonky this time to allow the skateboards to have their glory!!

Thanks and I'm looking forward to seeing a bunch of skateboard blocks. If you aren't in our sewing bee but do decide to make one, I'd love to see it! I want to make skateboard place mats next. I've made several skateboard pillow cases for my boys.


Kris

So cool, Kris! Great tutorial, I look forward to making some!!
ReplyDeleteThat is such a great block and quilt!! Excellent tutorial! I love the girly colours you've picked for this version.
ReplyDeleteIt is so awesome to find something my little guy would love! I know your is for a girl so unisex! Thank you so much!
ReplyDeleteLooking forward to making this!
ReplyDeleteThis comment has been removed by the author.
ReplyDeleteSorry about the delete but Ken did not post the message below, I (Rebecca) did. We share the account that is in his name. Regardless of the formalities - wonderful blog.
ReplyDeleteRebecca said...
Totally awesome. I had been wondering just what would be right for a 13 year old grandson and, through Elizabeth of OccasionalPiece -- Quilt!, I see what will be perfect. thanks for sharing all the steps/directions/pictures.
Yay for this fun block! Pulling fabrics right now, and hopefully I'll get a chance to make it today. One block or two?
ReplyDeleteWOW! These quilts are looking fantastic It will be my goodness If I will use your quilts in my Homes in Tuscany
ReplyDeleteThank you for sharing this. It looks fantastic and look forward to making this x
ReplyDeleteSkateboard pro shops all over the world are abundantly supplied with skateboarding videos showing famous skateboard champions. These kinds of movies are the best method of passing the knowledge on the subject of techniques and hints in the sport. Normally available as a series and often a collaboration between several skateboarding professionals, a skateboarding video is often a fountain of hope for new skateboard hobbyists to turn into skillful thrashers themselves. Best Skateboarding Wheels
ReplyDelete